Showing posts with label Configurations. Show all posts

Monday, January 14, 2019

Veritas NetBackup - Step by Step Whitepaper for Configuring VMware Backup Policy

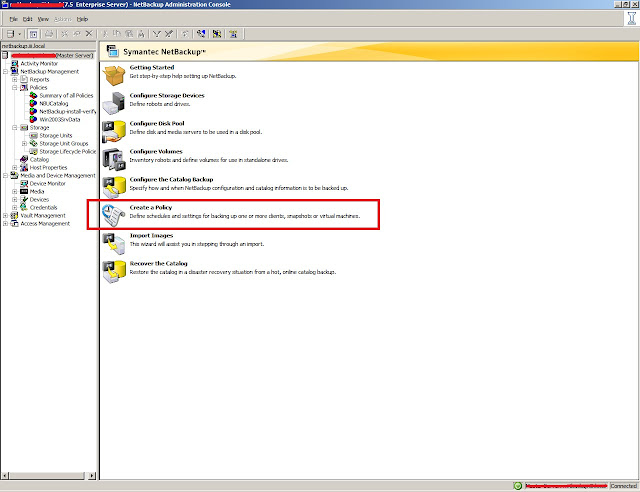
Today i'm going to explain how to configure your VMware integration or backup policy in Veritas Netbackup in a simple and straight way.
This Article provides the step by step process of Netbackup VADP configuration, credentials adding for different Virtual machine servers for Netbackup to enable the Vmware(VADP) backups.

Prerequisites

1.1) Make sure Netbackup Enterprises client license is installed on Master server and media server( in case of traditional based license)
1.2) Define backup host (backup host can be the master or media server also other server)
1.3)  Define the Virtual Machine server that needs to add have the info about the VCenter/Esxihost (name and IP address)
1.4) Verify the bi-directional communication between the Netbackup backup host & Master server to VCenter over the port 443 and ESXi over the port 902
Port 443 Vcenter⇔ Master Server & backup host
Port 902 ESXi ⇔Master Server & backup host
1.5) Get Credential on VCenter for Netbackup to use at the time of backup( if you would like to use the Esxi also for backups get the Credential on ESxi also)

Tuesday, December 11, 2018

NetBackup: Install Client Software in Veritas NetBackup (Symantec) – Windows OS

NetBackup client must be installed on the computer before creating a backup policy, client software can be installed by locally (CD ROM)  or remotely via network. Here is the small tutorial about installing client on Windows 2003 server.
Run browser.exe from CD ROM or HDD. Setup will start, Select Installation menu, then select Client Software Instillation.
NetBackup: Install Client Software in Veritas NetBackup (Symantec) – Windows OS
Click Next on welcome window.

NetBackup: Create Backup Policy in Veritas NetBackup (Symantec) – Verify Windows or Unix Policy

NetBackup: Create Backup Policy in Veritas NetBackup (Symantec) – Verify Windows or Unix Policy
Backup policy has to be created to backing up the client data over the network, before crating a policy; install Symantec NetBackup 7.5 client on remote machine. While doing the post configuring it might ask you to create data backup policy or you can create new backup policy from admin console.
Backup policy can be created from Admin Console.

Saturday, June 13, 2015

Free Hyper V Configuration Tool by manageengine

Free Hyper V Configuration Tool
Virtual servers provide great cost benefits as opposed to real physical server. This encourages people to run many applications and services on these virtual servers. The application, that is running within the virtual servers need to be running all the time. Sometimes, during emergency situations, few VM's require more resources to manage the demanding, resource intensive applications running on them. In that critical moment, it becomes imperative to allocate more resources, such as CPU, RAM to that VM's. Hence, it is important to monitor and manage those virtual servers(VM's) continuously at all the times
The ManageEngine's Free Hyper V Configuration tool addresses this monitoring and management requirement. The Free software can configure Microsoft Hyper V Virtual server (VM's ) resources such as CPU, RAM or execute Power operations or change the boot order start-up, and also it fetches comprehensive data about the servers and its virtual machines and presents them as visually elegant graphs and reports in a desktop tool dashboard.
Manage Engine Hyper-V Configuration Tool can configure Hyper V Server from the remote location. The best part is that the tool is made available to you absolutely FREE of cost.

Features:
·  Easy to use dashboard tool
·  Hyper V server – CPU , Memory, Disk Monitoring
·  Virtual server (VM) – CPU configuration
·  Virtual Machine (VM) – RAM configuration
·  Power on, Suspend, Power–off VM from remote

Key Benefits
ManageEngine Free Hyper V Configuration Tool provides an exclusive configuration solution for Hyper-V server, a Virtual Machine, running on Windows 2008 R2. Using the free tool, the administrator can increase or decrease the RAM capacity, or allocate more number of CPU processor for the VM, or execute 'power operations' on the Virtual servers like 'power-on' the VM's , suspend the VM's , 'Power Off' the VM and Pause the VM, and it allows the operator to select the Boot-order for each VM', either it may be from Disk, CD Rom, Pxe boot and more.
Tool populates actual resource utilization details of the virtual servers along with CPU usage, Memory details, Disk and Network utilization of each guest operating system. The dashboard quickly shows how many virtual machines are present, how many are powered-on / powered-off or suspended state and displaying its severity as Critical or Warning in a elegant Tree-View, and also, how much CPU are allocated to / consumed by each Virtual Machine etc., in an intuitive bar graph.
The ManageEngine Hyper V Configuration Tool serves as a smart desktop tool that continuously monitors Hyper V, a Microsoft virtual server, across your network and more importantly, it empowers you to manage / configure those VM's in real-time and ensures your mission-critical applications run smoothly.

Download ManageEngine Hyper V Configuration Free Tool 1.0

 3 MB)
Note: Please read and accept the License Agreement before downloading the software


Thursday, November 21, 2013

Gmail via Outlook for Windows and Mac - Step to Step Configuration

Google Mail (GMAIL) via Outlook for Windows and Mac - Step to Step Configuration
Here is another tip for Gmail Users, Now you can configure Gmail in your MS office Outlook with more handy, Our Step by Step Guide will differently help even Beginners/Dummies much easier,

Promotion for India: Check out Online Shopping Deals, Coupon & Lowest Price Products from Our Price Comparison Web Site - http://www.dealdimer.com


  To configure Outlook for Windows so it can retrieve Google Mail: 
  1. In Outlook, choose the File tab.

Tuesday, February 21, 2012

How to Activate GodMode in Windows 7

Want to activate GodMode in Windows 7? Here's how!
Windows 7 users are all abuzz about the OS and its GodMode. If you haven't heard of it, GodMode is a feature that was revealed by CNet's Microsoft Correspondent, Ina Fried. GodMode is a folder that brings together a long list of customization settings allowing you to change all your settings from one place. Neat huh? It's very easy to enable and damn useful if you tweak things around a lot.
I've broken it down into five-step process to avoid confusion:
Step 1: Right click.
Step 2: Click create folder.

Wednesday, February 8, 2012

Upgrade from Windows Server 2003 Domain Controller to Windows Server 2008


Introduction

I have been using Windows Server 2003 for years and I believe its time to shift and try using Windows Server 2008, I have downloaded RC0 and decided to Upgrade my Domain Controller, which is also a DNS & DHCP Server to Windows Server 2008 Standard Edition RC0. In this article, I will show you step by step how to perform an in-place upgrade for a Domain Controller from Windows Server 2003 To Windows Server 2008 RC0

Note: This article was written when Windows Server 2008 was still RC0. Changes might occur later once the product is RTM'd Upgrade Steps
  1. On you Windows Server 2003 DC, insert the Windows Server 2008 DVD, and then open command prompt and run the following commands, make sure first to browse to the adprep directory inside the Windows 008 DVD , in my case case, the F drive is the DVD Drive letter, so to browse to the adprep directory I would write the following inside cmd:cd f:\sources\adprerp

    adprep/ forestprep

Friday, October 7, 2011

How to install Turbo C++ on Windows 7


We are providing detailed procedure how to install Turbo C++ on Windows 7.

Users having Win 7 Proand Win 7 Ultimate should use the virtual Windows XP Mode to install Turbo C++.
Installing Turbo C++ on Windows 7

1. Extract the zip files to: e.g. C:\TurboC


Extract zip files
2. Run the install: C:\TurboC\INSTALL.EXE


Run the install
3. Press Enter to continue


Press Enter to continue
4. Enter the Source drive: e.g.C and press Enter to continue


Enter the Source drive

5. Enter the Source path: \TURBOC and press Enter to continue


Enter the Source path
6. In directories specify where Turbo C files are copied. E.g. C:\TC . When done go to start instalation and press Enter


Specify where Turbo C++ files are copied
7. Succesfull instalation


Succesfull instalation

8. First launch from your destination e.g. C:\TC\BIN\TC.EXE

How to install Turbo C++ on Windows 7 64bit


Providing step-by-step procedure how to install Turbo C++ on 64 bit Windows 7.

1. Install the software DOSBox ver 0.73 : download here

2. Create a folder,for example „Turbo“ (c:\Turbo\)

3. Download and extract TC into the Turbo folder (c:\Turbo\): download here

4. Run the DOSBox 0.73 from the icon located on the desktop:


5. Type the following commands at the command prompt [Z]: mount d c:\Turbo\ [The folder TC is present inside the folder Turbo]

Now you should get a message which says: Drive D is mounted as a local directory c:\Turbo\


6. Type d: to shift to d:


7. Next follow the commands below:

cd tc
cd bin
tc or tc.exe [This starts you the Turbo C++ 3.0]


8. In the Turbo C++ goto Options>Directories> Change the source of TC to the source directory [D] ( i.e. virtual D: refers to original c:\Turbo\ . So make the path change to something like D:\TC\include and D:\TC\lib respectively )

How to start TurboC++ in the DOSBox automatically:

You can save yourself some time by having DOSBox automatically mount your folders and start TurboC++:
For DOSBox versions older then 0.73 browse into program installation folder and open the dosbox.conf file in any text editor. For version 0.73 go to Start Menu and click on “Configuration” and then “Edit Configuration“. Then scroll down to the very end, and add the lines which you want to automatically execute when DOSBox starts.

Automatically mount and start Turbo C++3.0 in DOSBox ver 0.73:


Scroll down to the very end, and add the lines:


Those commands will be executed automatically when DOSBox starts!

Please note:

Full screen: Alt and Enter

When you exit from the DosBox [precisely when u unmount the virtual drive where Turbo C++ 3.0 has been mounted] all the files you have saved or made changes in Turbo C++ 3.0 will be copied into the source directory(The directory which contains TC folder)

Don’t use shortcut keys to perform operations in TC because they might be a shortcut key for DOSBOX also . Eg : Ctrl+F9 will exit DOSBOX rather running the code .

VIDEO tutorial (there is another setup – original path to Turbo C++ is h:\tc\ and drive H is mounted as drive C:)

Tuesday, September 13, 2011

How to make bootable pen drive with iso image

1. Download and install UltraISO trial.

2. Plug in your pen drive.

3. Open UltraISO as Administrator (right-click shortcut, "Run as Administrator")

4. Open the CD/DVD image file you want to write to pendrive in this instance of UltraISO (File>Open).

5. Under the Bootable menu, select Write Disk Image.

6. A new dialog should open up, listing your pen drive(s).

7. Select the pendrive you want to write your image to.

8. Set the Write Method to USB-HDD (or USB-HDD+ if your BIOS supports it).

9. Click the Write button, and then click Yes/OK in the warning dialog (All data on this drive will be destroyed ....... do you want to continue) that pops up.

8. relax and enjoy the Tip.


Download Link For UltraISO

Tuesday, August 9, 2011

The Benefits of Using Gmail with Microsoft Outlook

Ever since Google added IMAP support in Gmail, I have almost stopped visiting the Gmail website and manage all my email inside Microsoft Outlook.
Though Outlook with Gmail IMAP can sometimes become painfully slow, there are still plenty of reasons to continue using Outlook as a Gmail Message Reader - you get less spam, more storage space and more.
1. Get more storage space in Gmail
gmail deleted email
Microsoft Outlook lets you search emails based on the size of the message.
Therefore you can easily discover emails that clog your Gmail Inbox and delete them inside Outlook -the bulky message will immediately disappear from Gmail servers too.
Cleaning up the inbox was extremely inconvenient when Gmail provided only POP3 access.
outlook gmail spam 2. Double Protection from Spam
Gmail spam filters are excellent but not perfect so spam can still sneak into your Inbox.
Now Microsoft too provides their own junk email filters in Outlook so the chances are very high that spam which manages to fool Gmail will get caught by Outlook Junk email filters.
Google and Microsoft are technically not working together to build a common email spam management solution but with Outlook and Gmail, you indirectly get the best of both worlds.
gmail linkedin 3. Learn About the Sender from LinkedIn
The excellent LinkedIn Toolbar for Outlook adds a small "info" link to each of your email messages.
You can hover the mouse over this link to learn more about sender of the email provided he or she has a profile on LinkedIn.
Once you start using this LinkedIn feature in Outlook, you'll almost get addicted to it. Sometimes I find it more efficient than Googling a person's name.
4. Right-Click and Block Email Senders
block gmail in outlookThough you can create rules in Gmail to automatically route email to the Trash or Spam folder, Outlook makes it all the more simple - you can right click any email message and say "Add Sender to Blocked Senders List".
Alternatively, you can block email from entire web domains (abc.com) or Top Level Domains (like .ru or .cn) in simple steps.
Related: Effective Gmail Search Commands
5. Import pictures of your Outlook/Gmail Contacts from Facebook
This is one of my favorites - you get an email in Gmail, it downloads to your Outlook account, you add that person to your address book and then import his/her photograph, website URL and other details from Facebook using any of the Facebook-Outlook sync services.
You can then sync your Outlook contacts with your BlackBerry or other smart phones. Very useful.
Please Click any of the following link


Bonus Tip: You don't need any hacks for creating rich email signatures in Gmail - Outlook will do that for you.

Easily Transfer Emails from Hotmail to Gmail Via Outlook Connector

Make that switch from Windows Live Hotmail to Gmail but the problem is how to move old Hotmail email messages and folders to the new Gmail address ? Hotmail doesn't support IMAP or POP3 and it will take years to manually forward individual emails from Hotmail to Gmail.
move emails from hotmail to gmail
No worries, there's a wonderful solution that costs $0 and comes from Microsoft itself - its the Office Outlook connector and works with Outlook 2003 and Outlook 2007.

Here's a step by step guide on moving emails from Hotmail to Gmail via Outlook:
1. Install the Outlook connector and then configure your MSN Hotmail / Windows Live Hotmail accounts with Outlook.
2. Once you have all your Hotmail email message available locally inside Outlook, configure Gmail IMAP access inside Outlook.
3. Now copy or just drag-n-drop the Hotmail folders (downloaded in Step 1) over your Gmail Inbox folder in Outlook. Its the same migration procedure as described in a previous tutorial - Backup Outlook Email to Gmail.
As your Outlook synchronizes with Gmail, all your Hotmail messages will become available inside Gmail as well. And if you have multiple Hotmail accounts, this trick will help you consolidate email messages from all those account at one place.
Please Click any of the following link


Export and Backup Emails from Outlook to Gmail Online


Looking for a trick to archive all Outlook email messages (and folders) to his online Gmail account for two reasons - one is secure backup and two, he will be able toaccess his old emails from any computer.
gmail-outlook-backup
Solution: It is quite easy to transfer Outlook emails to your Gmail mailbox. Here's a step by step guide:
Step 1: Enable IMAP in your Gmail account and then configure Outlook (or Outlook Express or Windows Live Mail) to sync with your Gmail address via IMAP. Read this guide.
archive-pstStep 2: Import your Outlook PST file into a Personal folder that is different from your default Gmail Inbox.
To import, click File -> Import And Export -> Import from another program or file. -> Next -> Personal Folder File (.pst) -> Next.
Select the PST file that contains your email, then pick the email folders that you want to import in Outlook and clickFinish.
Step 3: Select the Personal folders that you want to backup online and copy them your Gmail Folder in Outlook (see screenshot).
In the Folder List, right-click the folder you want to copy and click Copy Folder name. Click the Gmail Folder in Outlook to copy that folder in that location. You can repeat the steps as needed for other folders.
copy-outlook-folderThat's it. Your Outlook email will soon become available inside your online Gmail Inbox.
If your switching from Hotmail to Gmail, check this tutorial on moving emails from Hotmail to Gmail.
Caution: The migration from Outlook to Gmail can take a long time if you have very large Outlook pst file or if your internet connection speed is slow. Therefore, consider removing all large emails before moving them to your Gmail via IMAP.
Please Click any of the following link

Check Hotmail Email Using the Office Outlook Connector

outlook hotmail email
While Hotmail doesn't offer POP3 access, Microsoft has released a free utility called Microsoft Office Outlook Connector that allows you download email from your Windows Live Hotmail account to local Outlook or Outlook Express.
With Outlook Connector, you can not only send or receive email - you get all the goodies of Outlook including the Junk Mail filter and powerful Rules Wizard of Outlook to help you auto-sort the incoming email.
To configure your Outlook with Windows Live Hotmail, just download the 3 MB Outlook Connector, type in your Hotmail username+password and you're done.
The best part is that if you have multiple accounts, you can manage them from one central location - your Outlook. Supports both Outlook 2003 and Outlook 2007.
Get Outlook Connector here. [outlookconnector.exe] Requires Windows Validation check.

Wednesday, August 3, 2011

Licensing ESX 4.x, ESXi 4.x, and vCenter Server 4.x


Licensing ESX 4.x, ESXi 4.x, and vCenter Server 4.x

Symptoms


  • Unable to remove ESX 4.x/ESXi 4.x from Evaluation Mode
  • Unable to upload the license file for vSphere
  • Unable to connect vSphere 4.x to vCenter Server
  • Unable to activate vSphere

license-vmware-products

Purpose

This article provides steps to add, assign, remove, unassign, and change the licenses of ESX 4.x, ESXi 4.x, and vCenter Server 4.x.

Resolution


You can add any number of licenses to the vSphere 4.x inventory. When assigning licenses in 4.x products, you can create a relationship between an asset and a license key. Each asset can be licensed by one and only one license key or it can be unlicensed and in Evaluation Mode.
Note: To perform these steps, your vSphere Client must be connected to the vCenter Server.
Adding License Keys
To add licenses:
  1. Log in to the vSphere Client.
  2. Click Home. Under the Administration section, click the Licensing icon.
  3. Click Manage vSphere Licenses.
  4. Enter the License Key in the Enter new vSphere license keys field (one per line).
  5. Include labels for new license keys as necessary.
  6. Click Add License Keys.

    After clicking Add License Keys, you can review the license keys you added, capacity counts, expiration dates, and labels associated with the license keys.
  7. Click Next to assign the license keys.
Assigning License Keys

To assign the license keys to vCenter Server or the ESX host:
  1. Log into the vSphere Client.
  2. Click Home. Under the Administration section, click the Licensing icon.
  3. Choose Evaluation Mode and expand the list. Find the product you want to license.
  4. Right-click on the product and choose Change License Key.
  5. Assign a key from list was entered previously on Manage License window.
  6. Click OK.
  7. Verify the product is licensed now.

    Note: When the cursor is hovered over 
    a license key in the Manage vSphere Licenses wizard displays a tool tip with all of the asset's information.

Removing License Keys

To remove license keys:
  1. Log in to the vSphere Client.
  2. Click Home. Under the Administration section, click the Licensing icon.
  3. Click Manage vSphere Licenses.
  4. Click Next.
  5. Click Next.
  6. Choose the license key you want to remove.
  7. Click Next to proceed to the confirm changes page.

    You can review your changes on the Confirm Changes page before applying them to your inventory.
  8. Click Finish to apply all of the changes.

Unassigning License Keys

To unassign a license key from a vSphere ESX host, choose one of these options:
  • Remove the ESX host from the vCenter Server inventory
  • Add a new license key and re-license the ESX host with it. This frees the initial license key that was assigned to the host.
    Note: A license key already assigned to an ESX host cannot be removed from the inventory.

Changing License Keys

To license your product with a different license key:
  1. Click Home. Under the Administration section, click the Licensing icon.
  2. Expand the product you want to change the license for.
  3. Right-click on the product and choose Change License Key.
  4. Choose the license you want to use to license the product.

    Note
    From this dialog you can place a product in Evaluation Mode during the first 60 days.
Licensing ESX/ESXi 

To license a standalone ESX or ESXi 4.x (vSphere Hypervisor):
  1. Log in to the ESX/ESXi host using vSphere Client.
  2. Click the Configuration Tab.
  3. Click Licensed Features under Software.
  4. Click Edit under Licensed Features.
  5. Select Assign a new license key to this host.
  6. Press Enter and enter the License Key.
  7. Click OK.

    For more information on downloading and licensing the free vSphere Hypervisor (ESXi 4.x), see Downloading and licensing vSphere Hypervisor (ESXi) (1012289).

Licensing vCenter Server

To license vCenter Server 4.x:
  1. Log in to the vSphere Client.
  2. Click HomeUnder the Administration section, click vCenter Server settings.
  3. Select Assign a new license key to this vCenter Server and click OK.
  4. Enter the license key for the vCenter Server and, if necessary, include labels.
  5. Click Next and Finish.
Notes

Evaluation

In the evaluation mode, you can access and use all features of ESX. The evaluation period is 60 days and begins as soon as you power on the ESX machine. To make full use of the evaluation period, make an early decision on whether to use evaluation mode. If you do not enter a vSphere license key during installation, ESX is installed in the evaluation mode. 
Note: Select the evaluation option to enable the evaluation mode. You do not receive a license key for evaluating vSphere.